photoshop合成雪中女王
- 2023-01-07 18:30:32
- 来源/作者:互联网/佚名
- 己被围观次
来源iPhotoshop litty译 This lesson we'll learn how to create an effect of artificial hair, work with textures and layers, create shadows and highlights and also represent flowery ornaments. 这篇教程我们将学习如何绘制假发,纹理处理,层操
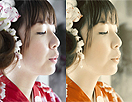
Place it on a layer under the girl's one. Mark it out and erase the background which it was situated on and then decolorize the layer.
放置在MM层下面,使用橡皮擦将胸针外的地方擦除,并将胸针大小调整到刚好和MM脑袋大小吻合当作MM的皇冠。

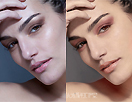
Make the brooch look bluer, applying Image -Adjustments -Photo Filter.
点击图像-调整-图片滤镜将胸针的色调也变成蓝色。

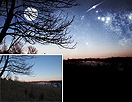
Get back to the background's layer and work with the color: make it profounder: (Curves)
回到背景层,调整色彩曲线,使得背景色更深邃一些。

Insert on a new layer the picture of a diamond.
新建层,添加一款钻石的图片。

*PSjia.COM 倾力出品,转载请注明来自PS家园网(www.psjia.com)
标签(TAG) 照片合成
上一篇:皮肤效果,教你做出塑胶皮肤效果
更多精彩内容
-
 40篇经典PS教程,全方面解读PS技巧
 -
 摄影后期:人像照片精修PS教程
 -
 高反差保留质感磨皮方法
 -
 PS中阴影的打造
 -
 照片面部油光和高光去除三法
 -
 李涛PS视频教程:广告级人像后期精修
 -
 Photoshop教程:蒙板换脸技巧
 -
 PS打造双重曝光照片