PS打造缤纷肖像艺术效果
- 2013-04-15 11:26:58
- 来源/作者:互联网/佚名
- 己被围观次
Photoshop Tutorial: Create a Chaotic Disintegration Effect on a Face Photoshop教程:在脸上塑造一个混乱分解的效果 This tutorial will show you a quick and easy way in creating a stunning disintegration effect in photoshop.I c
Step 6
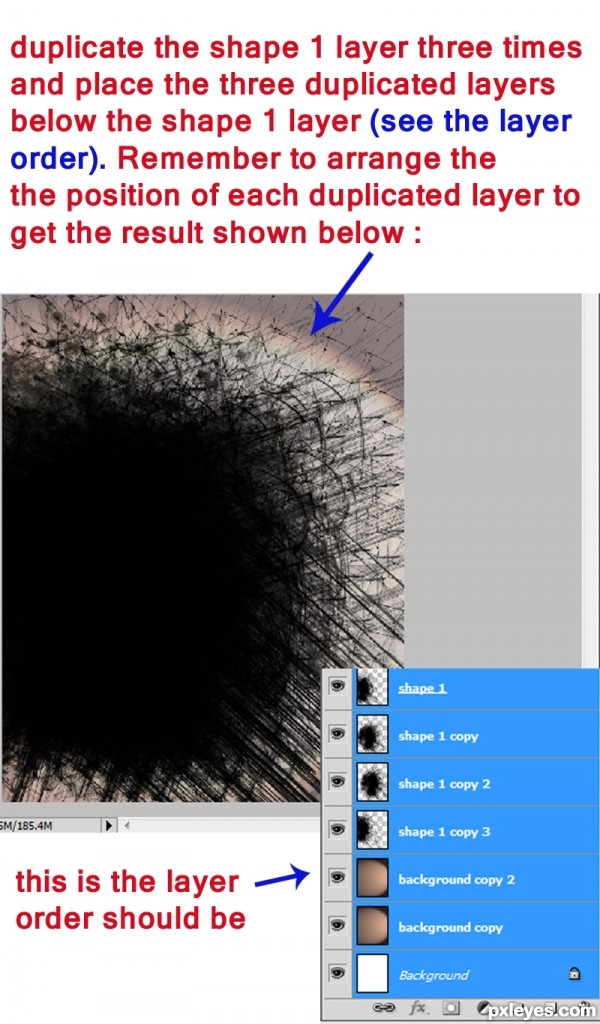
Next step is to duplicate the shape 1 layer three times and then place the three duplicated layers below it in the layers palette. Rearrange the position of each where needed. Set the shape 1 copy layer to normal blending at 100% opacity, while the shape 1 copy 2 and the shape 1 copy 3 layer are set to multiply blending at 78% opacity. See the image below..
接下来这一步是将shape 1图层复制三次,并将这三个性肤质的图层放到原图层shape 1之下。并按照你的具体需要重新调节新复制图层的位置。然后shape 1 copy图层混合模式保持不变,不透明度100%,而把shape 1 copy 2图层和shape 1 copy 3图层的混合选项调为正片叠底,不透明度78%。见下图。
Step 7
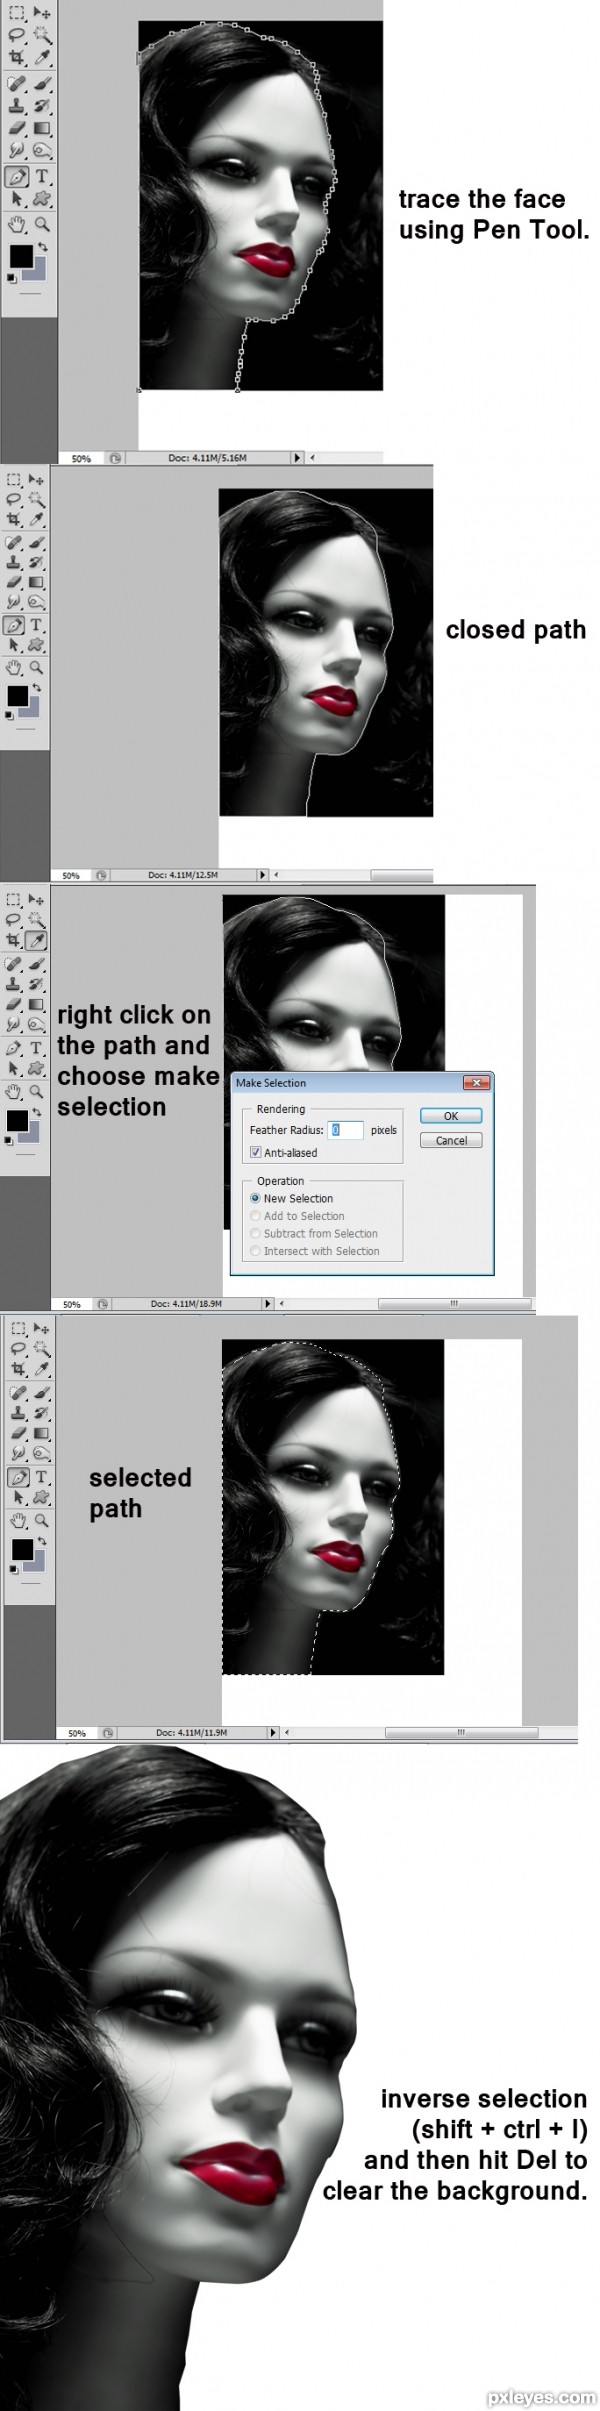
Now open the face image. We will cut out the face. To achieve this, select Pen tool (P) in tool palette. Continue to trace the face by clicking new anchor points as you go, these show as small squares on your screen. Proceed with tracing the face and work your way to meet the first anchor and close the path. After that, right click on the closed path. When the pop up window for the path execution comes up, choose make selection. Finally inverse the selection (Shift+Ctrl+I) and hit Del to clear the background.
现在打开人脸图像。我们需要把脸部扣下来。选择钢笔工具(P),沿着人脸轮廓描点画出路径,一直前进直到路径封闭。之后右键点击路径,弹出路径执行窗口,选择建立选区。最后反选,并按Del键删除背景(即不需要的部分)
(责任编辑:PS家园网)
*PSjia.COM 倾力出品,转载请注明来自PS家园网(www.psjia.com)
标签(TAG)
上一篇:图标设计思路分析
下一篇:PS制作暗黑3风格血球
更多精彩内容
-
 文字排版技巧知识大全
 -
 电商产品PS修图:金属质感效果
 -
 色彩叠加在各类设计中的巧妙运用
 -
 PS CS5制作逼真绳子
 -
 PS绘制柔美飘逸的丝带
 -
 PS制作一款科技感的立体插图
 -
 banner制作初级教程
 -
 如何设计一个高端大气上档次的 logo?