PS打造缤纷肖像艺术效果
- 2013-04-15 11:26:58
- 来源/作者:互联网/佚名
- 己被围观次
Photoshop Tutorial: Create a Chaotic Disintegration Effect on a Face Photoshop教程:在脸上塑造一个混乱分解的效果 This tutorial will show you a quick and easy way in creating a stunning disintegration effect in photoshop.I c
Step 8
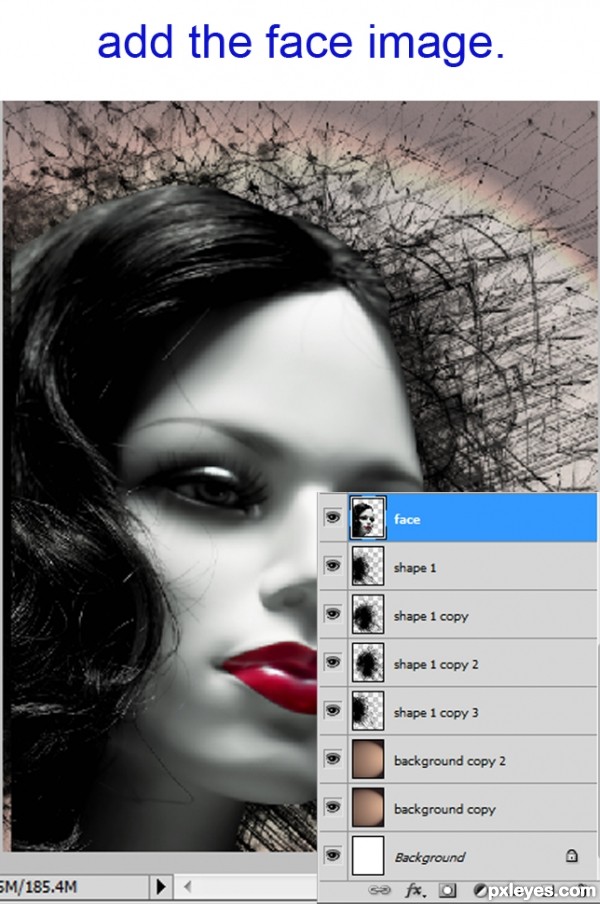
Add the face to the canvas. It will be a new layer and name it Face in layers palette.
将脸复制添加到原先的文件中。它将作为一个新的图层,名字先暂定为Face。
Step 9
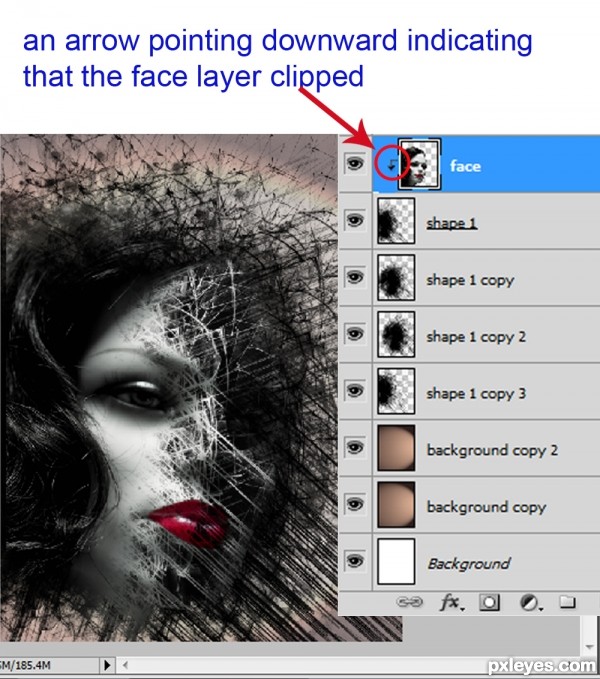
Now it’s time to crate the disintegration effect to the face. We will use Clipping Mask to achieve this. To create a Clipping Mask, first make sure the shape 1 layer is directly under the face layer that we want to be clipped in the Layers palette . Hold down Alt and click the line between the two layers in the Layers palette. The cursor changes to a symbol. Click the mouse. You will see a small arrow pointing downward next to the face layer. This small arrow is the indication of a layer clipped mask.
好的,现在是到给人脸添加分解效果的时候了。我用的是剪贴蒙版来达到这一效果。将shape 1移到我们将要修改的Face图层之下,按住alt键的同时点击在这两个图层之间的分界线(就是点击两个图层之间)。光标改变,点击鼠标,会看到指向下面图层的箭头,则表示图层已经成为图层蒙版。
Step 10
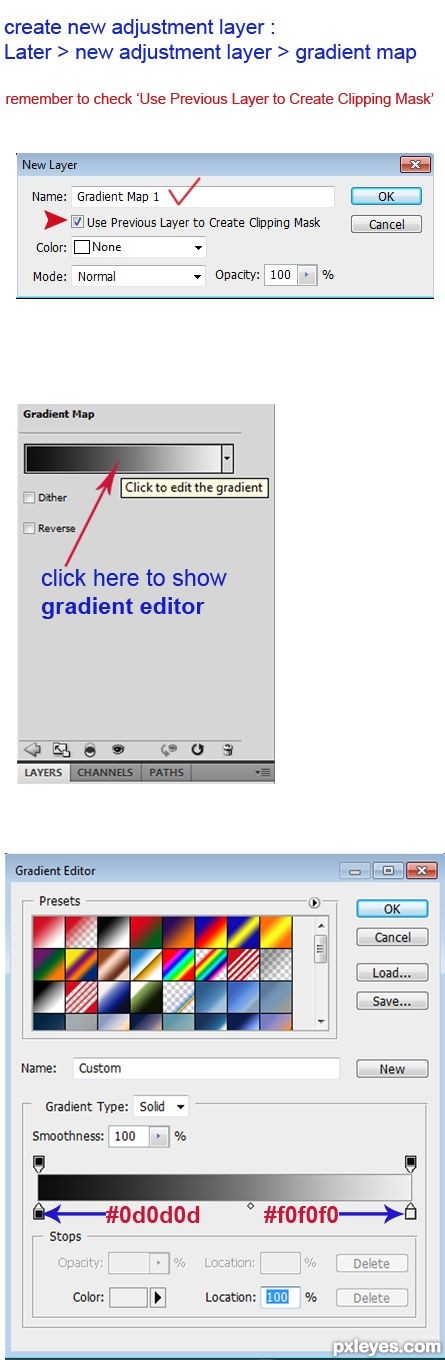
In this step we will add Gradient map. Go to Layer > new adjustment layer > gradient map.
这一步我们将添加渐变映射。选择图层>新建调整图层>渐变映射
(责任编辑:PS家园网)
*PSjia.COM 倾力出品,转载请注明来自PS家园网(www.psjia.com)
标签(TAG)
上一篇:图标设计思路分析
下一篇:PS制作暗黑3风格血球
更多精彩内容
-
 文字排版技巧知识大全
 -
 电商产品PS修图:金属质感效果
 -
 色彩叠加在各类设计中的巧妙运用
 -
 PS CS5制作逼真绳子
 -
 PS绘制柔美飘逸的丝带
 -
 PS制作一款科技感的立体插图
 -
 banner制作初级教程
 -
 如何设计一个高端大气上档次的 logo?